Showing posts with label recipes. Show all posts

Monday, January 10, 2011

Molten Chocolate Cakes

Since Ryan usually makes me a cake for my birthday, I decided that I should bake something for his birthday this year. After looking at various recipes, I decided to try my hand at molten chocolate cakes.

This
was the basic recipe I followed, but I made a few changes.

Ingredients

1 cup unsalted butter
8 ounces dark chocolate, cut into bite-size chunks
4 large eggs
1/2 cup sugar
Pinch of salt
4 teaspoons flour (or matzo meal, ground in a blender to a fine powder)
1 tsp vanilla extract

Garnish:
1 (6 ounce) container raspberries, barely moistened and rolled in about
1/2 cup sugar right before serving

Directions

1. Melt butter and chocolate in a medium heat-proof bowl over a saucepan of simmering water; remove from heat. Beat eggs, sugar and salt with a hand mixer (or whisk) in a medium bowl until sugar dissolves. Beat egg mixture and chocolate mixture together until smooth. Stir in vanilla extract. Beat in flour or matzo meal until just combined.

2. Adjust oven rack to middle position; heat oven to 450 degrees. Line a standard-size muffin tin (1/2 cup capacity) with 8 extra-large muffin papers (papers should extend above cups to facilitate removal). Spray muffin papers with vegetable cooking spray. OR use ramekins that have been oiled or sprayed with cooking spray. Divide batter equally among muffin cups or ramekins.

3. Bake until batter puffs but center is not set, 8 to 10 minutes. (When cracks begin to appear on the top, the cakes are done.)

Muffin cups: Carefully lift cakes from tin and set on a work surface. Pull papers away from cakes and transfer cakes to dessert plates.

Ramekins: Remove from oven. Let cool for a few minutes, then turn upside down onto dessert plates. It may help to run a knife around the edge before turning them upside down. Cakes can also be served in the ramekins.

4. Top each cake with sugared raspberries and serve immediately with vanilla ice cream.


Notes:

1. The original recipe calls for 5 eggs. Since I was just making cakes for Ryan and myself, I halved the recipe and used 2 eggs. They came out perfectly fine, so if you're doing the full recipe, I'm quite certain that 4 eggs will work.

2. Instead of rolling the raspberries in sugar right before serving, I tossed the berries in sugar before putting the ramekins in the oven so that they had time to macerate. When the cakes were done, I put the berries on top and drizzled the "syrup" over everything.

Friday, December 12, 2008

Pumpkin Chocolate Chip Cookies

This might be my favorite cookie recipe ever. I usually make them around Thanksgiving and Christmas, but sometimes I make them as early in the year as Halloween. Hey, pumpkins are a big part of Halloween too, okay?

Pumpkin
Chocolate Chip Cookies

1 cup butter
1 cup white sugar
1 egg
1 teaspoon vanilla extract
1 cup canned pumpkin puree (can be increased to 1 1/2 cups for stronger pumpkin flavor)
2 cups all-purpose flour
1 teaspoon baking soda
1 teaspoon salt
1 teaspoon ground cinnamon
1 (3.4 oz) package instant vanilla pudding mix
1 package milk chocolate chips (12 oz or so)


1) Preheat oven to 350 degrees. Grease cookie sheets (or line with parchment paper or silicon baking mat).

2) In a large bowl, cream together the butter and sugar. Beat in the egg and vanilla, then stir in the pumpkin puree.

3) In a separate bowl, combine the flour, baking soda, salt, cinnamon, and vanilla instant pudding mix; gradually mix into the pumpkin mixture. Stir in the chocolate chips.

4) To make the dough easier to work with, refrigerate for 45 minutes to an hour (or longer, it doesn't really matter). Roll into walnut sized balls and place them 2 inches apart onto the prepared cookie sheets.

5) Bake for 12-15 minutes in the preheated oven or until lightly browned at the edges. If you chilled the dough, it'll be more like 15-20 minutes. Allow to cool completely.


Tuesday, November 4, 2008

Pumpkin Bread

With Thanksgiving coming up, I thought I'd post this recipe for pumpkin bread. Just about every year, shortly after Halloween, my mom would bake pumpkin bread using this recipe. She got it from her old friend and first boss, Anette, when she worked at Bullock's department store, back when we lived in California.

But that's enough history. Let's get to it, shall we?

Ingredients

1 C sugar
1/2 C oil
2 eggs
1 C pumpkin puree
1 1/2 C all purpose flour
1/4 tsp. salt
1/2 tsp. baking powder
1/2 tsp. baking soda
1/2 tsp. ground cloves
1/2 tsp. cinnamon
1/2 tsp. nutmeg

Preheat oven to 325 degrees.

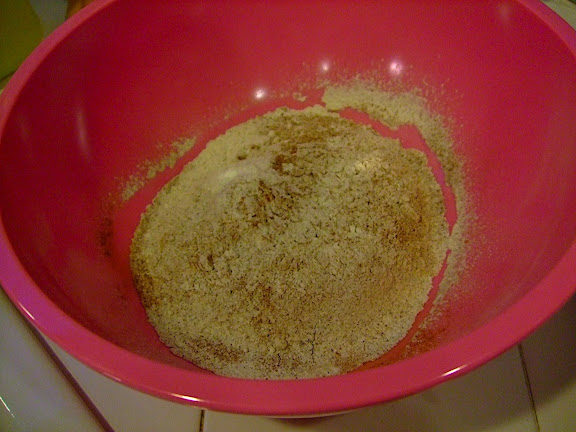
In a large mixing bowl sift together flour, salt, baking powder, soda, and spices.

Dry ingredients
Figure 1: Dry ingredients sifted together.


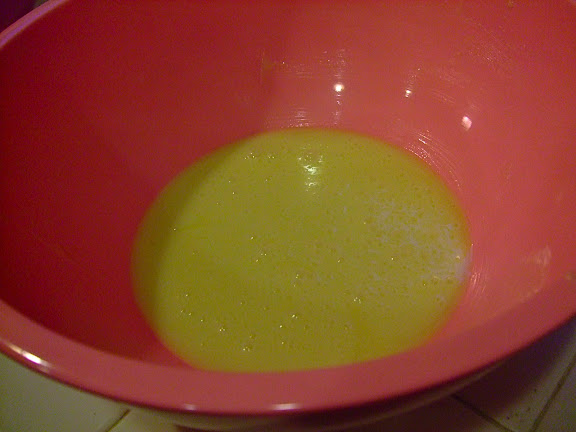
In another large mixing bowl, cream oil and sugar together. Beat in eggs, one at a time, until light and fluffy.

Wet ingredients
Figure 2: Oil, sugar, and eggs


Mix pumpkin puree into sugar, oil, and egg mixture. Although the recipe calls for 1 C of pumpkin, you can try adding more. Extra pumpkin will give you a denser, more pumpkin-ey bread. Personally, I like to put in about 1 1/2 C pumpkin puree.

Next, combine wet and dry ingredients by slowly adding dry to wet until. Stir till fully combined.

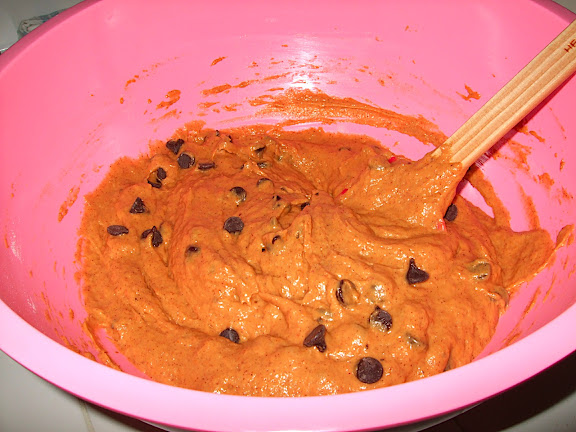
At this point you can fold in whatever extras you like. I've tried chocolate chips, nuts, and raisins. You can combine them or just use one. Try out whatever you think might taste good.

Add Chips
Figure 3: Folding in chocolate chips


Grease a 9" x 5" bread pan and pour in the batter. Bake bread for 45-60 minutes keeping in mind that times will vary from oven to oven and at different elevations.

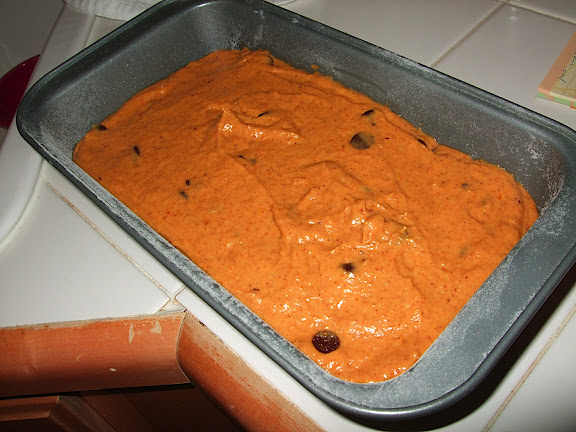
Before baking
Figure 4: In bread pan before baking


Check for doneness by inserting a knife or toothpick into the center of the loaf. If it's done, it should come out clean. Remove from oven and allow to cool for at least 10 minutes before removing from the pan.

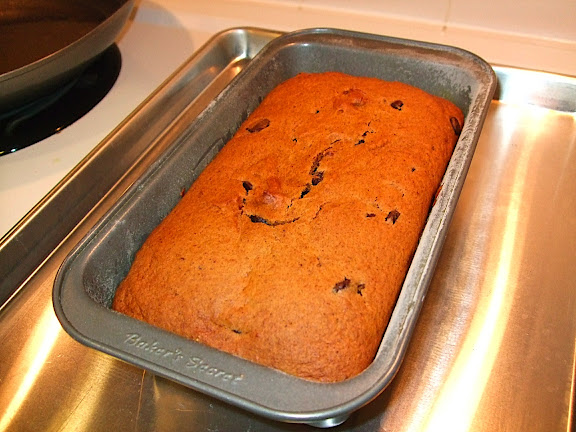
After baking
Figure 5: After baking


Eat it fresh out of the oven or toast a couple slices the following morning. No matter how you cut it, this stuff is awesome!!

Ready to eat
Figure 6: Sliced and ready to eat

Monday, October 20, 2008

Bread Head

Since I've had some time to myself, I've decided to try my hand at baking bread. I think that in the beginning, making bread from scratch can be quite daunting. However, if you give it a try I think that you'll find it not quite as difficult as you thought.

I took this basic bread recipe from my food hero, Alton Brown, host of Good Eats on Food Network. It's really simple and is also a good basis for experimenting with different ingredients and techniques.

Ingredients

1 lb (approx 3 2/3 Cups) bread flour
1 tsp. instant rapid rise yeast
2 tsp. honey
10 oz. filtered water
2 tsp salt

In a small bowl, mix together 1 cup of the flour, 1/4 tsp of the yeast, all the honey, and all the water. Whisk this up real good, cover loosely, and place in the fridge. It should sit for about about 8-12 hours, so it's a good idea to do this the night before you want to bake.
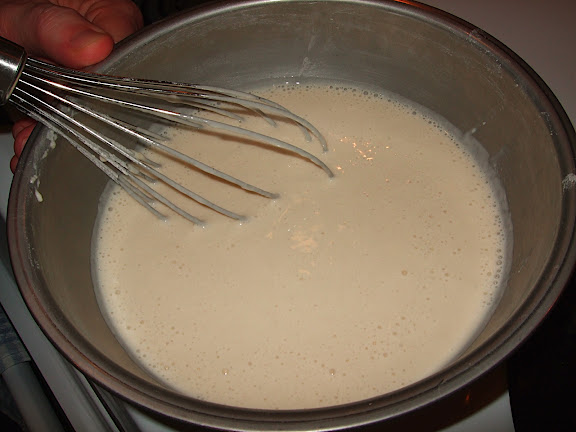
Starter
Figure 1: The starter after a good whisking.


8 to 12 hours later

In a large bowl, mix together the starter, the rest of the yeast, salt, and 1 cup of flour. Stir till it's well combined and then slowly add the rest of the flour. You might want to forgo the spoon at this point and just get in there with your hand. You can knead in the last of the flour in the bowl or you can do it a lightly floured surface.

If you're lucky enough to have a stand mixer, this step is a lot easier. If you've got a hand mixer, then I recommend that you put it back in the cupboard. I tried this out with a hand mixer and it wasn't that great. Best to stick to your trusty ol' wooden spoon.

How do you know when you can stop kneading? If you pull off a small piece of dough, you should be able to pull it out into a sheet thin enough that light can pass through. The dough should sticky but not so sticky that you can't handle it.
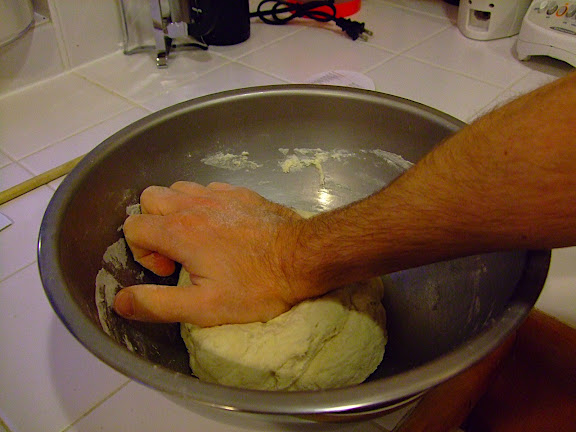

Kneading
Figure 2: Kneading in the flour


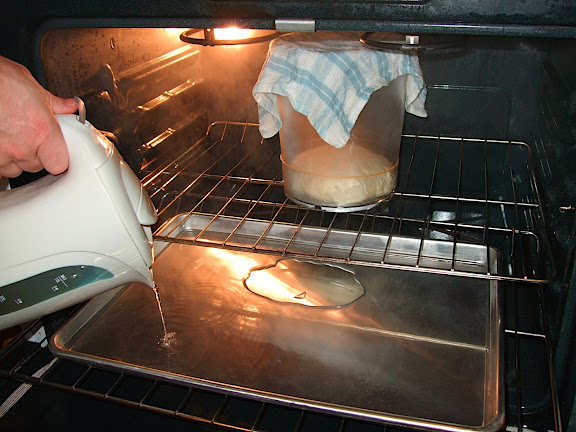
Grease a straight-sided container with vegetable oil or Pam and place the dough in it. Cover the container with a kitchen towel and place it in the oven (don't turn the oven on for this). Slide a shallow pan under the container and fill it with boiling water. Close the oven and let the dough rise until it's doubled in size. This should take about 1-2 hours.

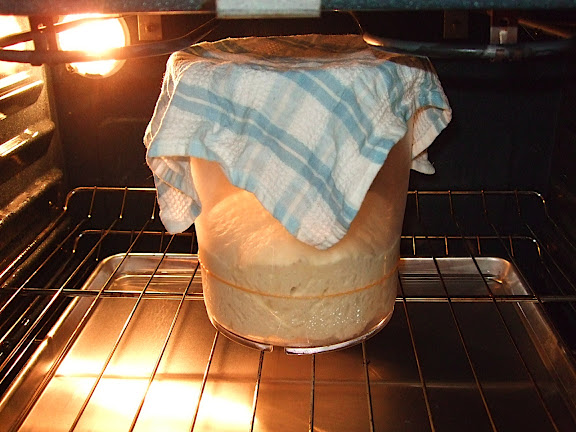
A neat trick I gleaned from Good Eats is to place a rubber band around the container to mark where the dough is prior to rising. This way you can more accurately gauge how much the dough has risen.
First rise
Figure 3: Dough covered and in container with a sheet pan filled with boiling water placed beneath it.


1-2 hours later
After bench proof
Figure 4: Dough after first rise.


Empty your dough out onto a lightly floured surface. Using your knuckles, press the dough out till it's flattened out enough for you to be able to fold the dough into thirds: first top to bottom, then left to right. Flip the folded dough over and press it out again. You're going to do this 2-3 times.

Cover the dough with a damp kitchen towel and let it rest for 10-20 minutes.

Press the dough out again and this time you're going to be forming the final shape of your loaf.

To make a round loaf bring the edges into the center and pinch them together, forming a jelly-fish like form. Place the dough down onto your floured surface with the pinched side down. Roll the dough between your hands to get it into a nice rounded shape. Place the dough onto a baking pan that's been dusted with corn meal.

To make a more oblong loaf, flatten the dough out and then roll it up tightly. Place it seam side down onto your baking pan (you dusted it with corn meal, right?) and tuck the ends under.

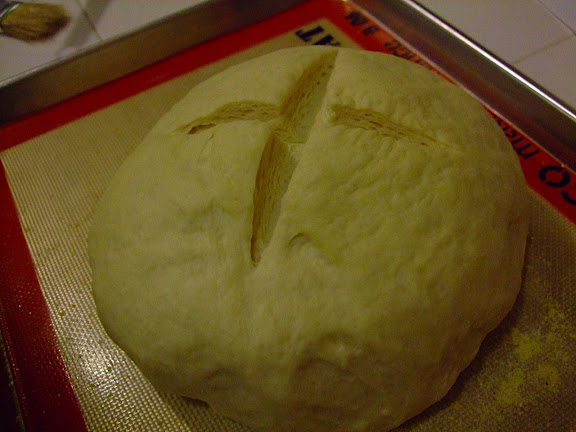
Cover the loaf with a moist kitchen towel and let it rise till it's doubled in size again. This should take about an hour. After it's risen, slash the top of the loaf a couple times.
Slashed
Figure 5: Dough after final rise with slashes.


At this point, I like to brush the bread with one of two options:

For a more rustic look, whisk together:

1 Tbsp cornstarch
1/3 cup water

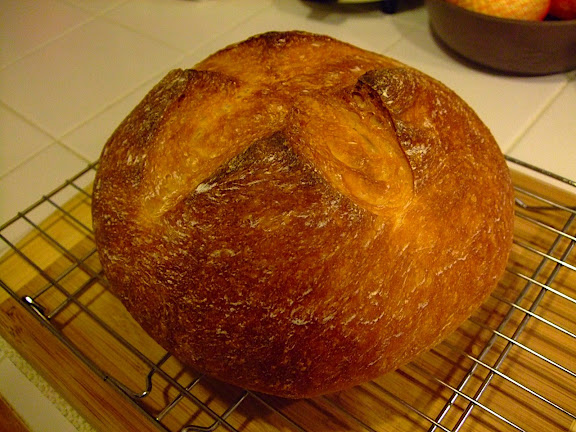
Brush onto top of loaf after slashing.

To give your loaf a bit of a shine, whisk together:

2 Tbsp water
1 egg white

Brush onto the top of the loaf after slashing and then again after about 20 minutes of baking.

Bake loaf in a 400 degree (F) oven for 35-45 minutes (watch carefully because this time varies from oven to oven). When putting the loaf into the oven, fill a shallow pan with boiling water again and place below loaf. When the bread is done, it should have an internal temperature of about 200-210 degrees.
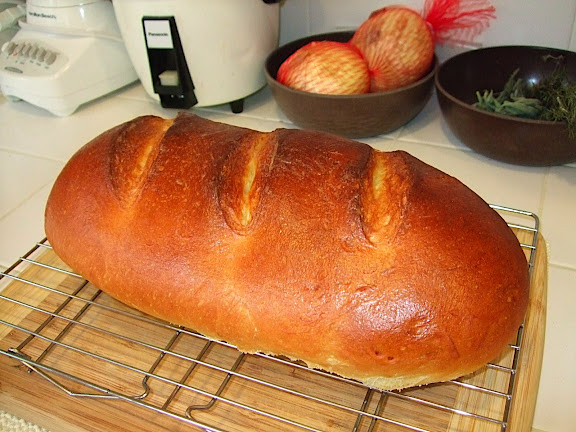
Round loaf
Figure 6: Round loaf with cornstarch wash.
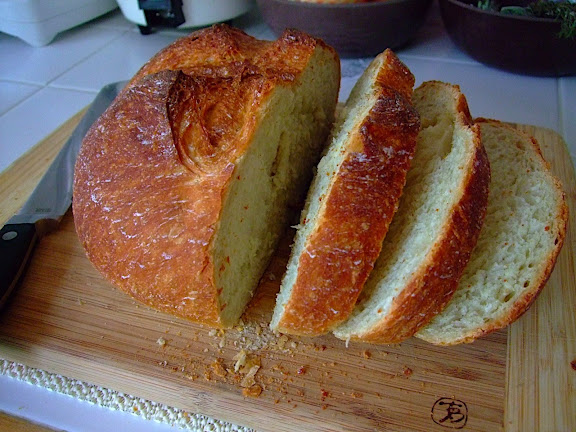

Sliced
Figure 7: Ready to eat!


Oblong loaf
Figure 8: Oblong loaf with the egg white wash.
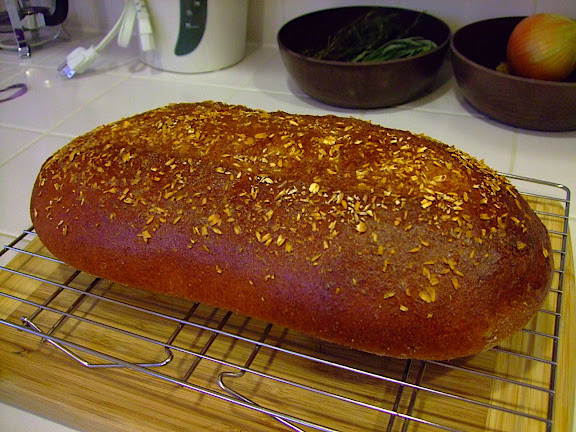

Whole wheat loaf
Figure 9: Whole wheat loaf with cracked oats sprinkled across the top (added after first brushing).


Have fun with this. You can do all kinds of things, add herbs, try different flours, or top the bread with different things.

Yay, carbs!

Sunday, September 21, 2008

Herb-Roasted Chicken and Vegetables

Last night, Ryan and I made a roast chicken for the first time. It ended up turning out really well, so we thought we'd share what we did.

We went to the U-District Farmers Market and bought some fresh herbs (thyme, sage, and rosemary), red potatoes, and green beans. Good stuff! Anyway, for our dinner, we decided to roast some potatoes and carrots with the chicken, and also have some green beans on the side. Other good vegetables to roast might be squash, zucchini, and artichoke hearts.

The oven should be pre-heated to 375 degrees. We used a 9x13 baking pan for the chicken. First we rinsed the chicken (make sure the inside is rinsed thoroughly) and patted it dry. Ryan lined the bottom of the pan with some sliced onions (cut into rings) and placed the chicken on top. We rubbed the chicken down with olive oil, melted butter, the fresh herbs, and some salt & pepper. Then we stuffed the chicken with onion, minced garlic, and some more herbs. After that, Ryan tied the chicken's legs together and pinned the neck skin.

We cut up the potatoes and carrots, then blanched them. After that, we tossed them with some olive oil, salt, and pepper. We arranged the potatoes and carrots at the bottom of the pan around the chicken. Then we roasted the chicken in the oven until its internal temperature was 180 degrees. Once the chicken was done, we took it out of the oven, covered the pan with foil, and let it rest for 10 minutes.

While the chicken was resting, we steamed the green beans. It took about 5-8 minutes. We tossed the green beans with butter, garlic salt, and salt & pepper. Then it was time to eat!

The chicken was delicious, but the potatoes and carrots might have been even better. The potatoes were a little crispy on the outside and soft on the inside, and the carrots were really nice and sweet. We kind of pigged out and ended up eating all of the potatoes and carrots last night. Mm-mm!

Sunday, August 24, 2008

Chocolate Haupia Pie

Ryan and I are leaving for Seattle soon, so we had a big BBQ last weekend. We decided to make two desserts for the occasion: brownies (which Ryan will be guest-blogging about later, since it's his specialty) and chocolate haupia pie.

I love chocolate haupia pie. Along with malasadas, it's probably my favorite local dessert. I first made it up in Seattle back in June. The recipe I had called for chocolate pudding and a graham cracker crust. It was pretty good, but not great. Then, at Costco earlier this summer, Ryan and I saw a cookbook by Jean Watanabe Hee called Hawaii's Best Local Desserts. She's written a bunch of "local" cookbooks; Ryan and I now own nearly all of them.

Anyway, there was a "from scratch" chocolate haupia pie recipe in her desserts cookbook, so Ryan and I decided to try it. It turned out really well. Ryan and I tweaked it a tiny bit and now it's even better!

Chocolate Haupia Pie


1 9-inch pie crust (from scratch or frozen)
12 oz (1 1/2 cups) coconut milk
1 cup sugar
1 cup milk *
1/2 cup cornstarch
1 cup water
6 oz semi-sweet chocolate **

1 1/2 cups heavy whipping cream
1/4 cup sugar
Shaved chocolate or cocoa powder for garnish

* I use skim milk; 1% or 2% will make everything thicker/richer. I think using whole milk might be overkill.
** The original recipe called for 7 oz of semi-sweet chocolate, and we found that it made the chocolate layer a little overpowering.

Prepare pie crust.

In a saucepan, whisk coconut milk, milk, and 1 cup sugar.

In a separate bowl, dissolve cornstarch in water. Bring coconut milk mixture to a boil. Reduce to simmer and whisk in cornstarch mixture until thickened. (Note: If the coconut milk mixture is still boiling when you add the cornstarch mixture, everything will thicken up VERY quickly. That's okay; just make sure you keep stirring so it doesn't get clumpy.)

Melt chocolate.
(The original recipe says to microwave the chocolate, but we used a double boiler. Either works.)

Pour half the haupia into a bowl.

Mix haupia with melted chocolate and pour into the bottom of the pie crust.

Layer white haupia on the top. Cool pie in refrigerator for at least an hour.

Whip cream with 1/4 cup sugar until stiff peaks form.

Garnish pie with whipped cream and shaved chocolate/cocoa powder. Chill for at least another hour.

Serve!

Wednesday, August 20, 2008

Pasta Casserole (easy!)

When I started cooking on my own, one of the first dishes I learned how to make was a ham-and-alfredo pasta casserole. I got the recipe from my friend Bri. It's really easy to make and everyone seems to like it. Win-win!

Pasta Casserole

You will need:
  • Pasta - non-strand. Anything like farfalle, fusilli, or penne is good.
  • Veggies - can be frozen or fresh. I usually use some combination of onion, broccoli, spinach, red/yellow/orange bell peppers, and artichoke hearts. I bet zucchini would be really good, but I haven't tried it yet. Mushrooms work, too. If using frozen veggies, don't thaw them first.
  • Ham - the fully cooked kind. Sometimes I buy ham steaks; it just depends what's on sale.
  • Alfredo sauce - from scratch or from the jar. I make this dish when I'm feeling lazy, so I've always just used the stuff in a jar. I like Classico's Sun-dried Tomato Alfredo best. If I don't have that, I'll use regular alfredo and add in sun-dried tomatoes myself.
  • Shredded mozzarella (optional)
There are no exact quantities, except that I always use one jar of pasta sauce. It all depends on what proportion of pasta to ham to veggies you want.

Pre-heat oven to 350 degrees. Cook pasta. While pasta is cooking, chop up veggies and cube ham. Drain pasta. Dump pasta, ham, and veggies into 9x13 baking pan. Pour alfredo sauce on top. Fill pasta sauce jar 1/3-1/2 full with milk. Put lid on (duh), shake jar, and pour on casserole. Toss lightly until everything is fully coated with sauce. The dish should be slightly soupy-ish but not drowning. Bake for approximately 35 minutes or until veggies are cooked through. Remove pan from oven and sprinkle mozzarella on top. Stir and serve.